
Hello May, how are you all doing? Your umbrella been getting a good outing this month? Today i’m back at the Georgian Apartment for for the final reveal of the bathroom. Hoorah!
This is what we started with…
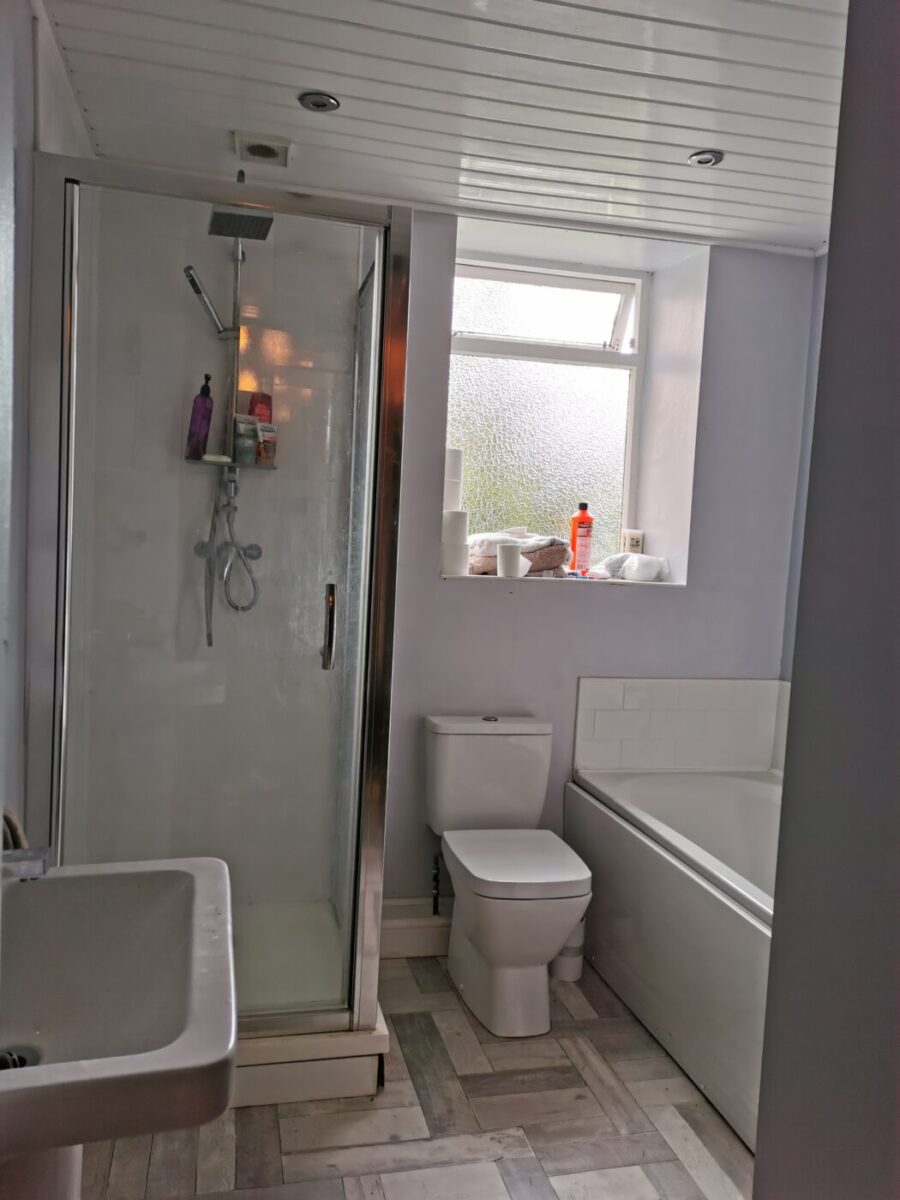
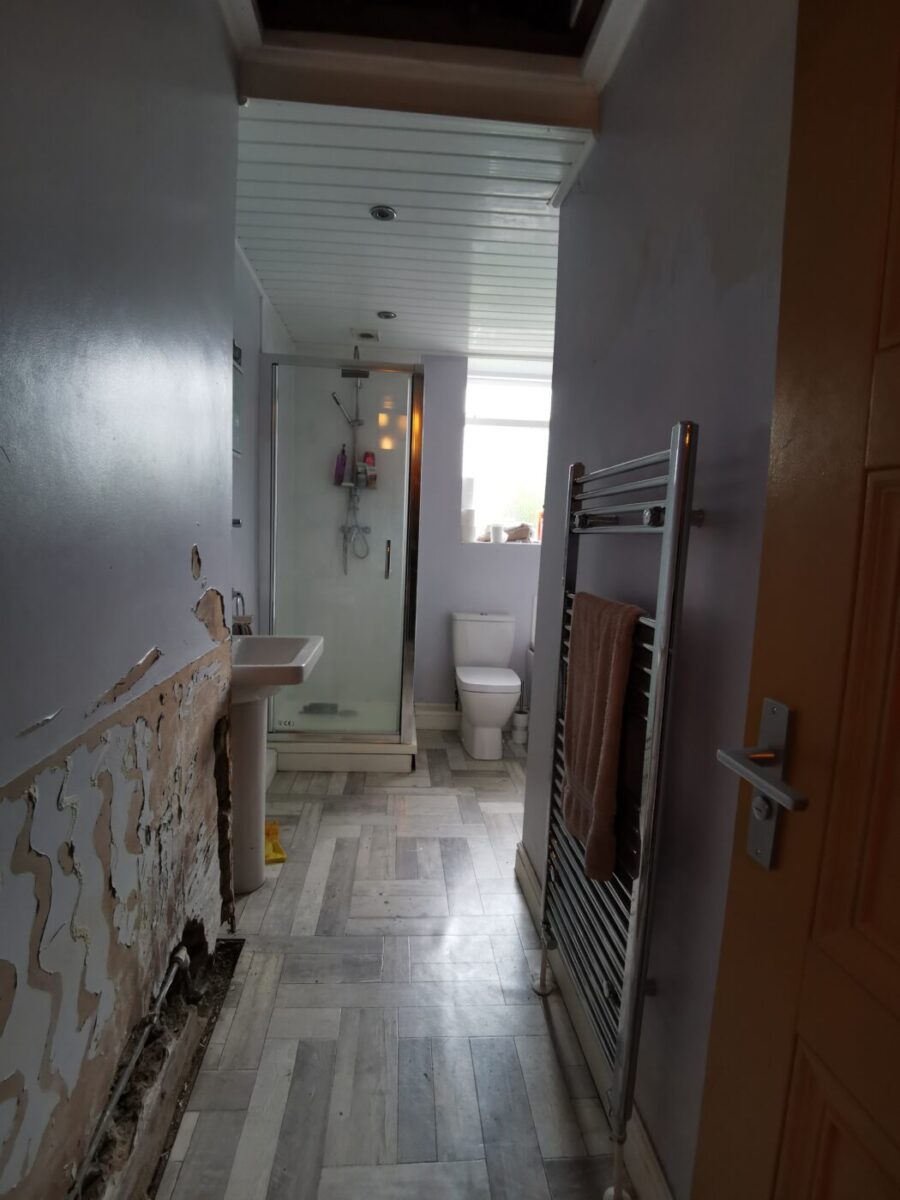
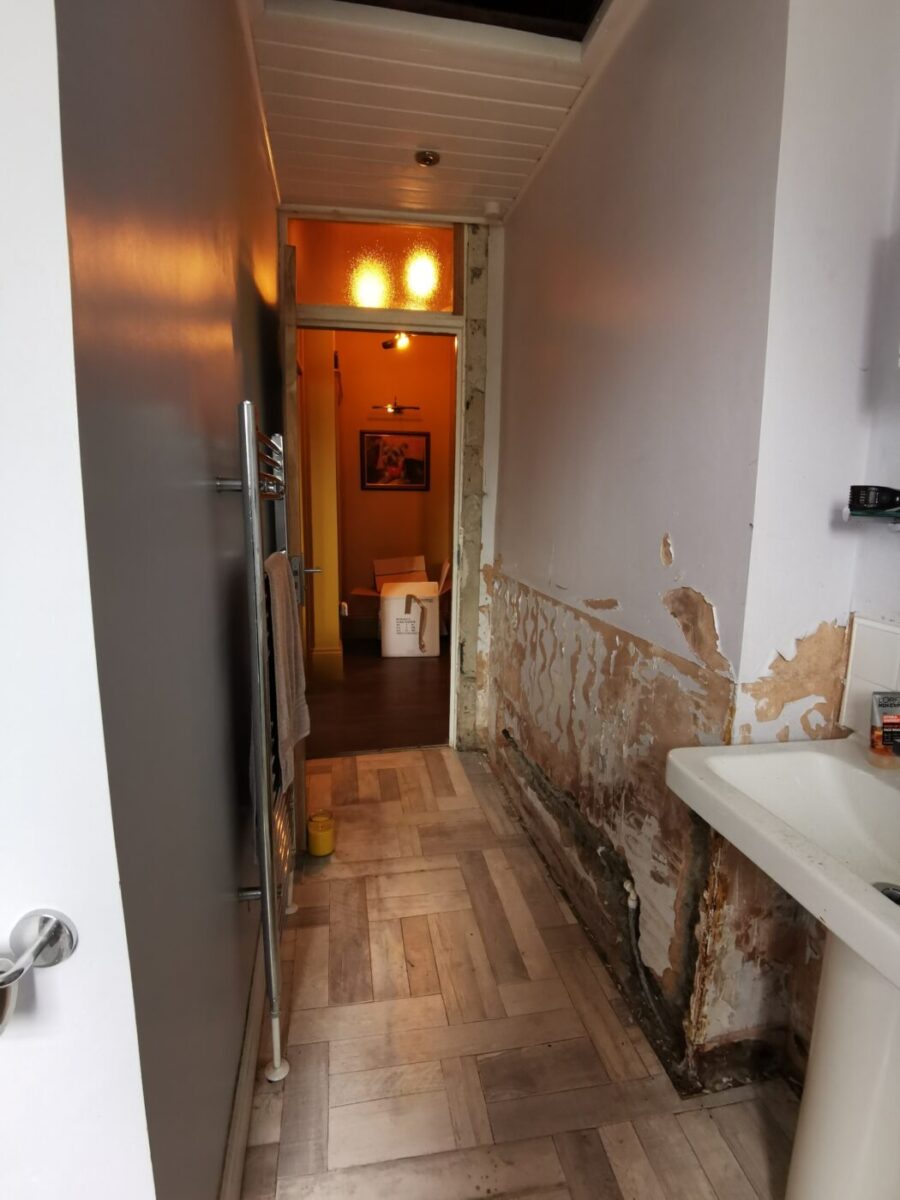
Before
A very small and narrow space indeed which surprisingly (or not) the previous owners had squeezed in a loo, basin, bath and a separate shower, but absolutely no storage whatsoever and not a lot of room for “people”.
When planning a bathroom, always allow space for you, the user(s) to move around, especially family bathrooms as they often have the whole clan in there at bath-times.

Original Layout
Initially I gave Mr B a few layout options, which looked at providing a walk in shower next to a plunge bath (a smaller footprint bath with much higher sides so you sit up and soak rather than lie down), but as Mr B also needed to use his bathroom to shower off his little Yorkshire Terrier after long muddy walks, we stuck with a shower over bath set up.
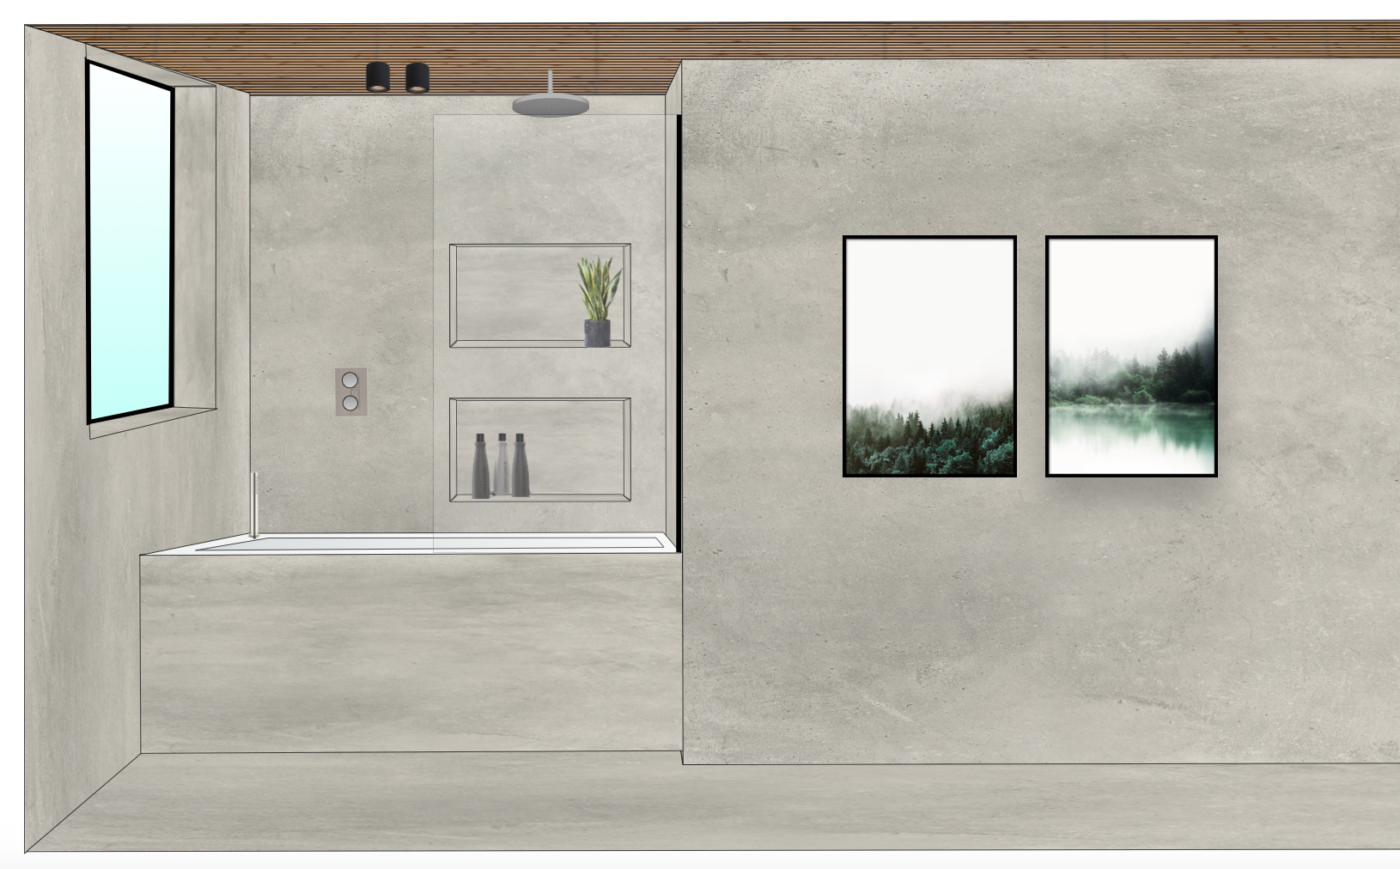
Bathroom concept – shower over bath
A lot of people can be a bit snobby about having showers over baths, but I think they’re actually the best possible solution for most bathrooms. Most bathrooms in the UK are not much bigger than a super king sized bed (about 4 sqm) so why try and squeeze in that seemingly fancy separate shower but compromise on much needed bathroom storage and usable space?
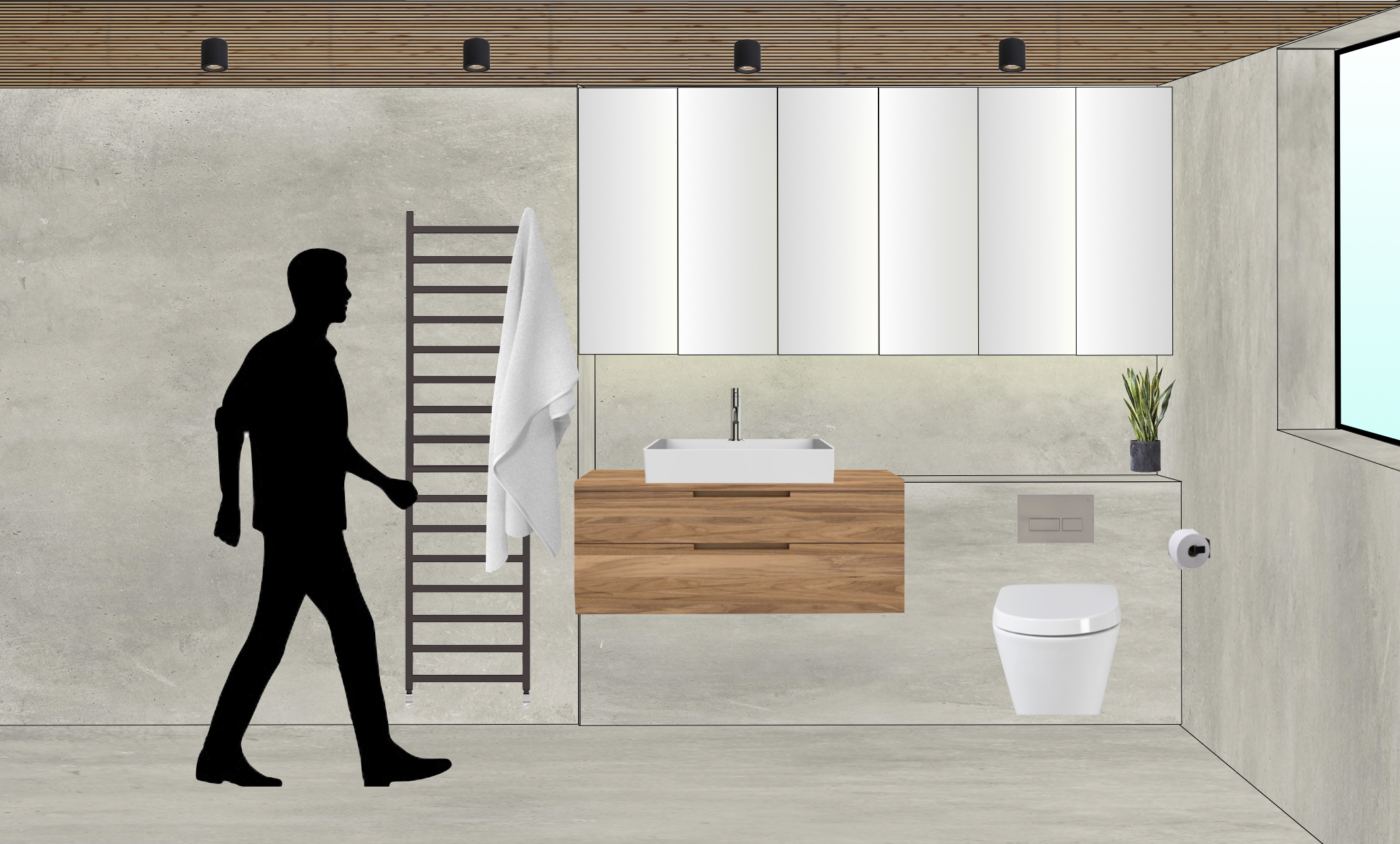
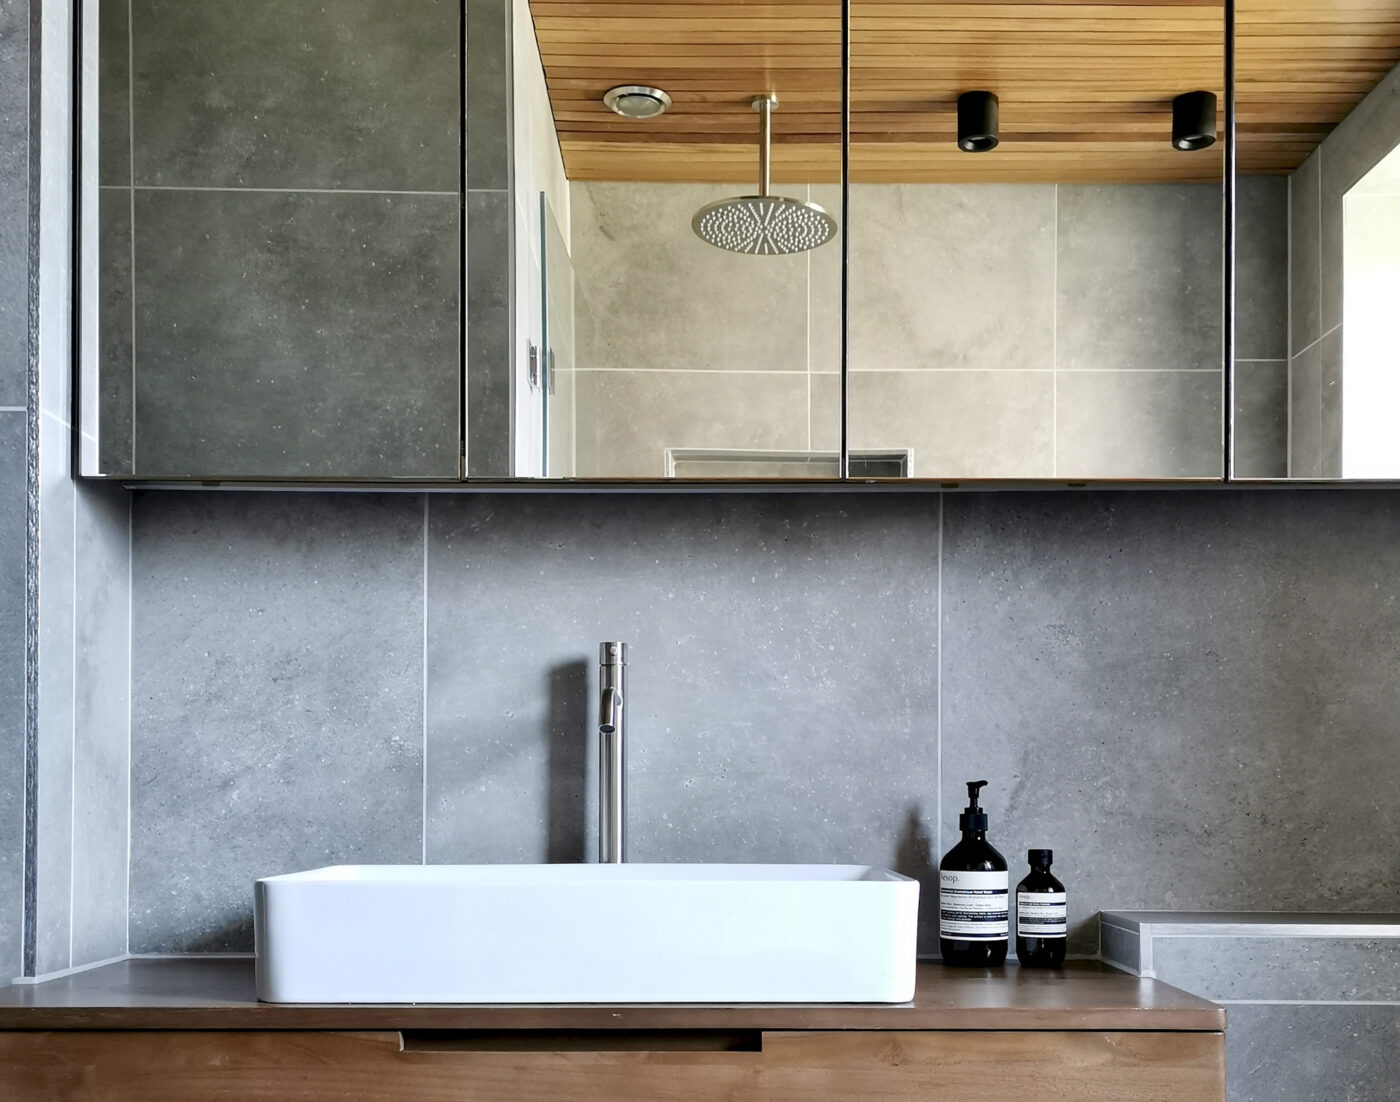
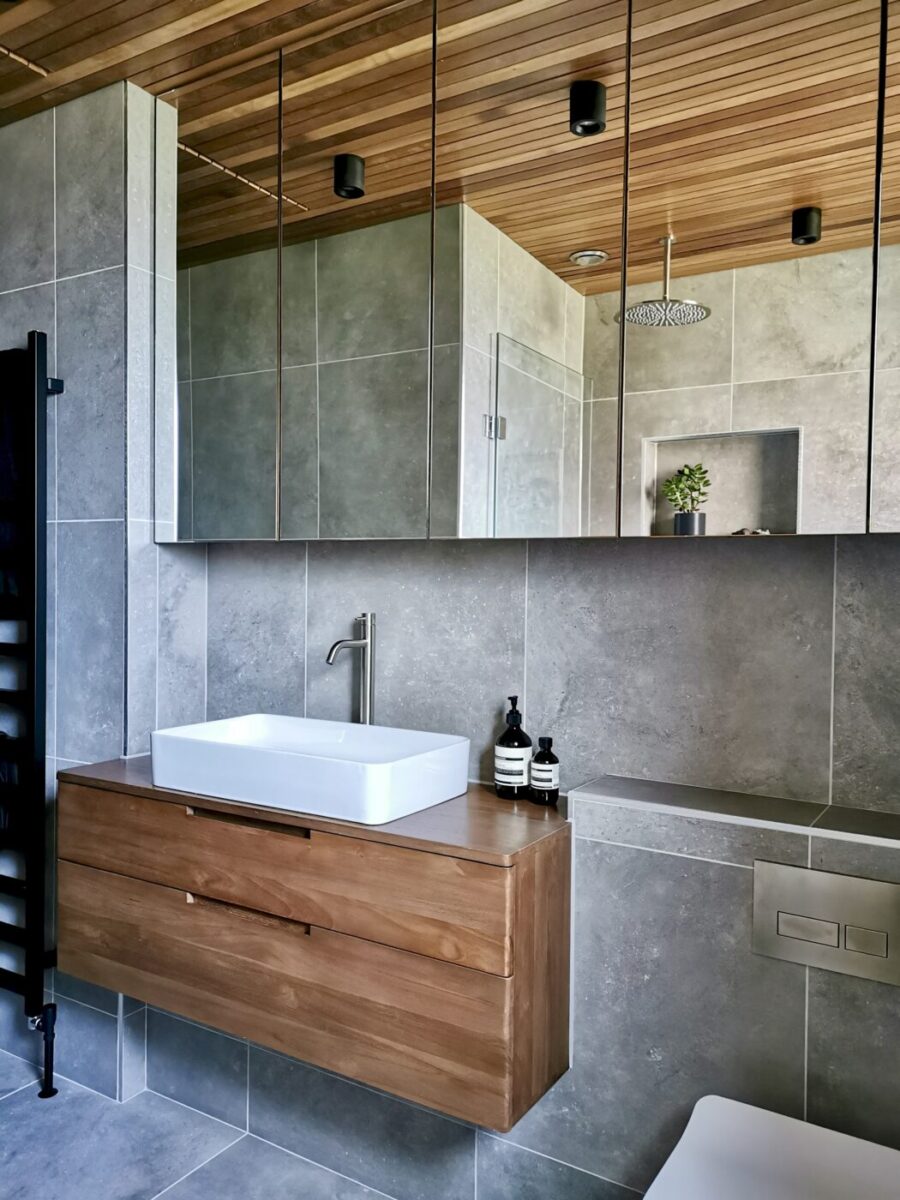
Despite having literally no floorspace left for storage, we had plenty of wall space which we used to the max! I designed a full height mirrored storage cabinet that ran the full length and height of the main bathroom space. This sat above a double drawer vanity unit that ran into a shelf above the wall hung loo with hidden cistern.
Before

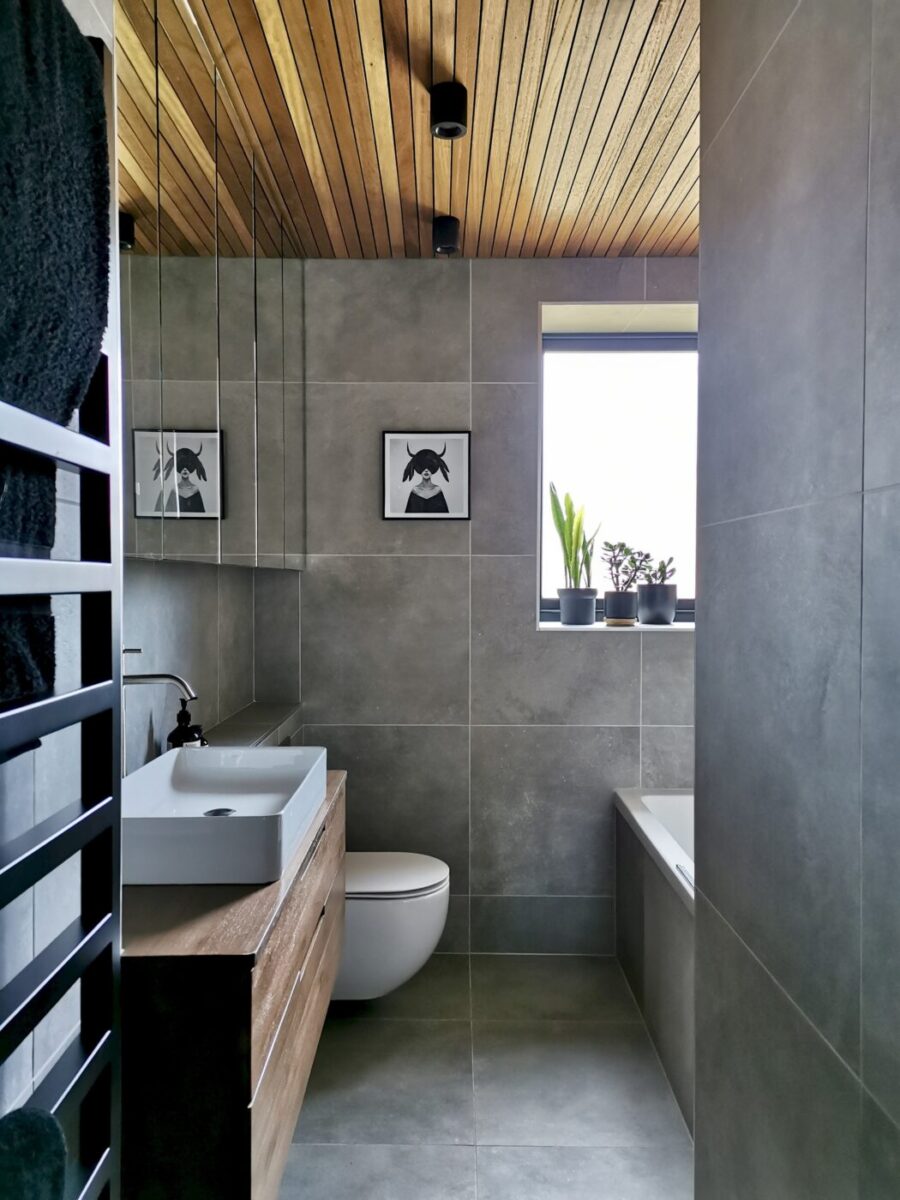
After – with new black double glazed window too!
Another thing the mirrored cabinet did was make the room look twice as wide. By taking the glass all the way up to the ceiling, it seamlessly reflected the beautiful Iroko slatted ceiling, giving you twice as much Iroko goodness.
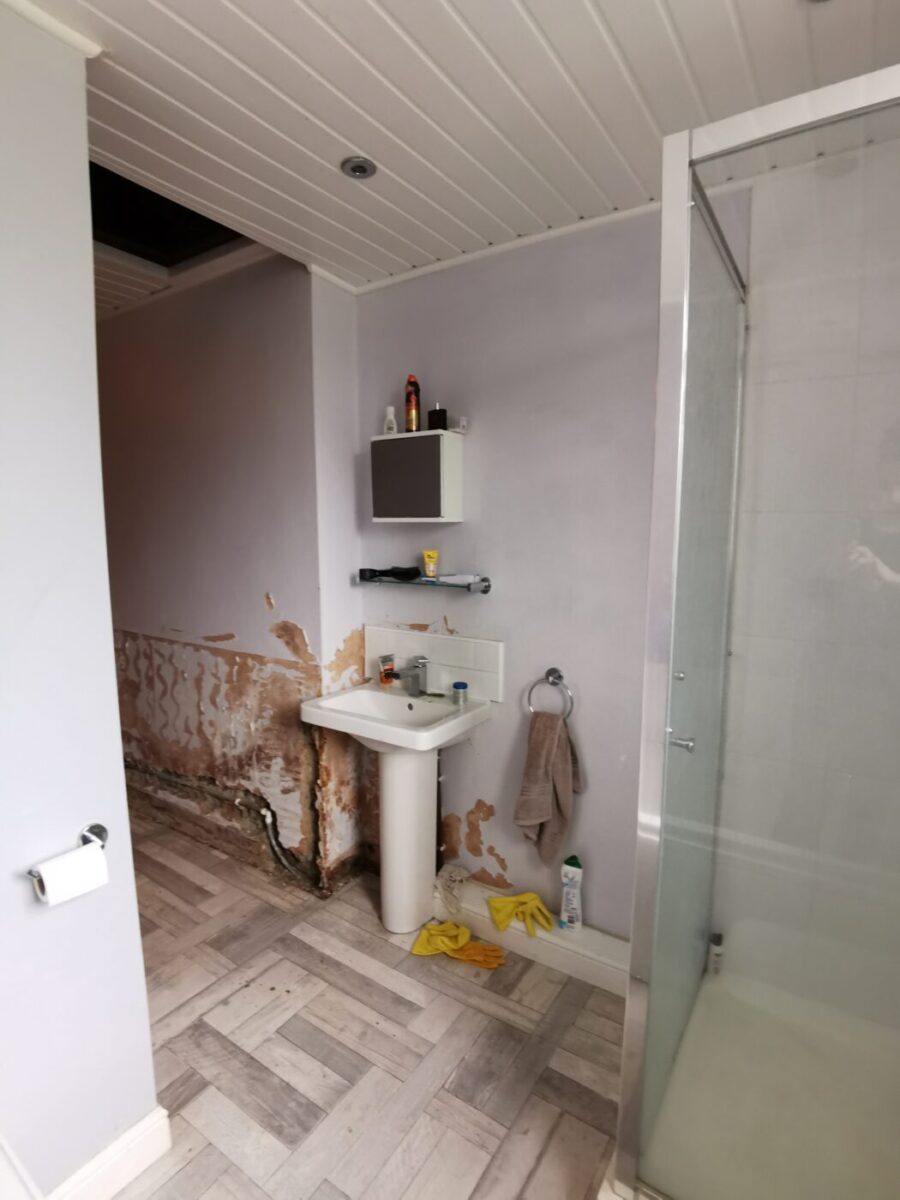
Before – with nowhere to put your rubber gloves or Mr Muscle
Mr Muscle now behind closed doors
The bespoke, made to measure wall cabinets housed all the shampoos, lotions, potions and loo rolls, and the vanity drawers were filled with clean towels. This allowed the rest of the room’s super simple, clean lines to remain simple and clean.


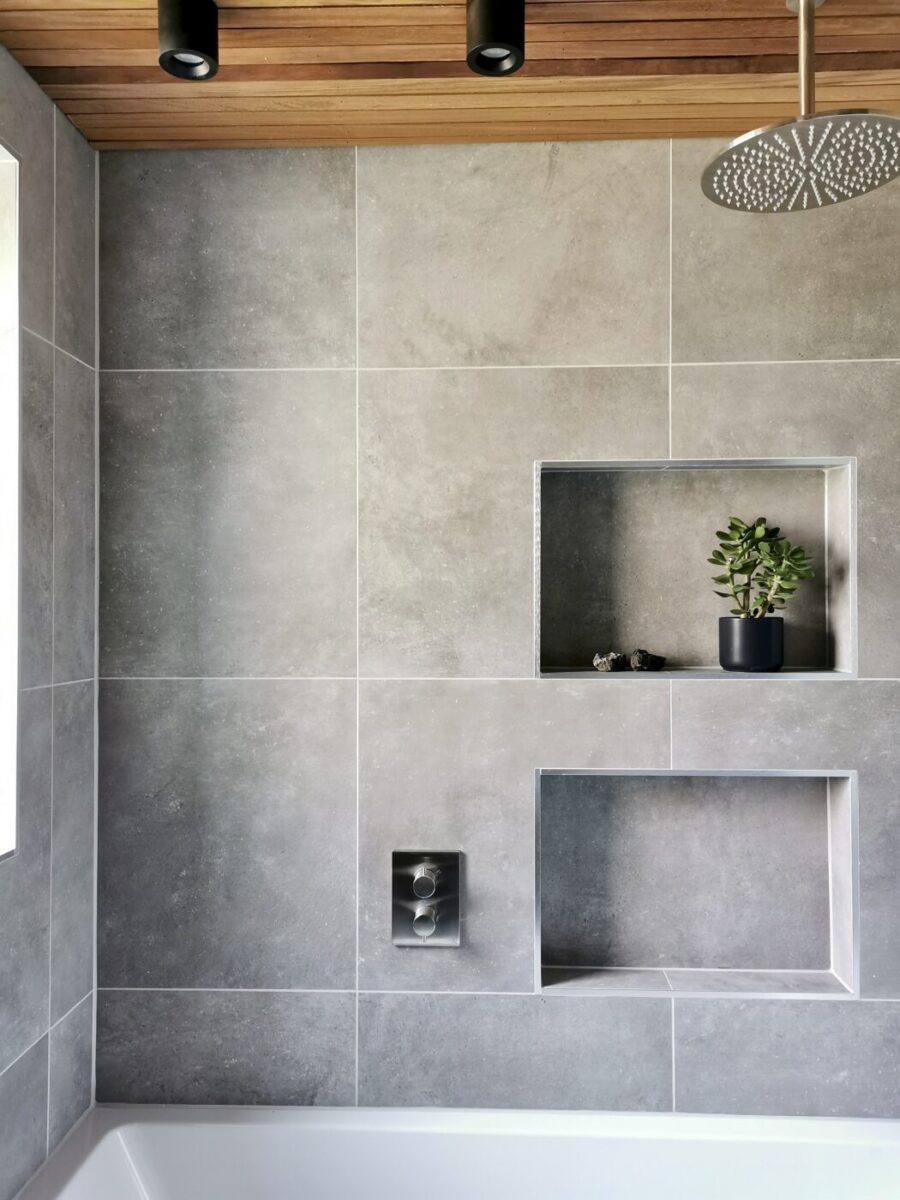
All of the brassware was in brushed stainless steel. Nothing shiny in here thank you. The stainless steel with the concrete effect tiles and warm timber tones provide a timeless bathroom design that will keep Mr B sorted for years to come.
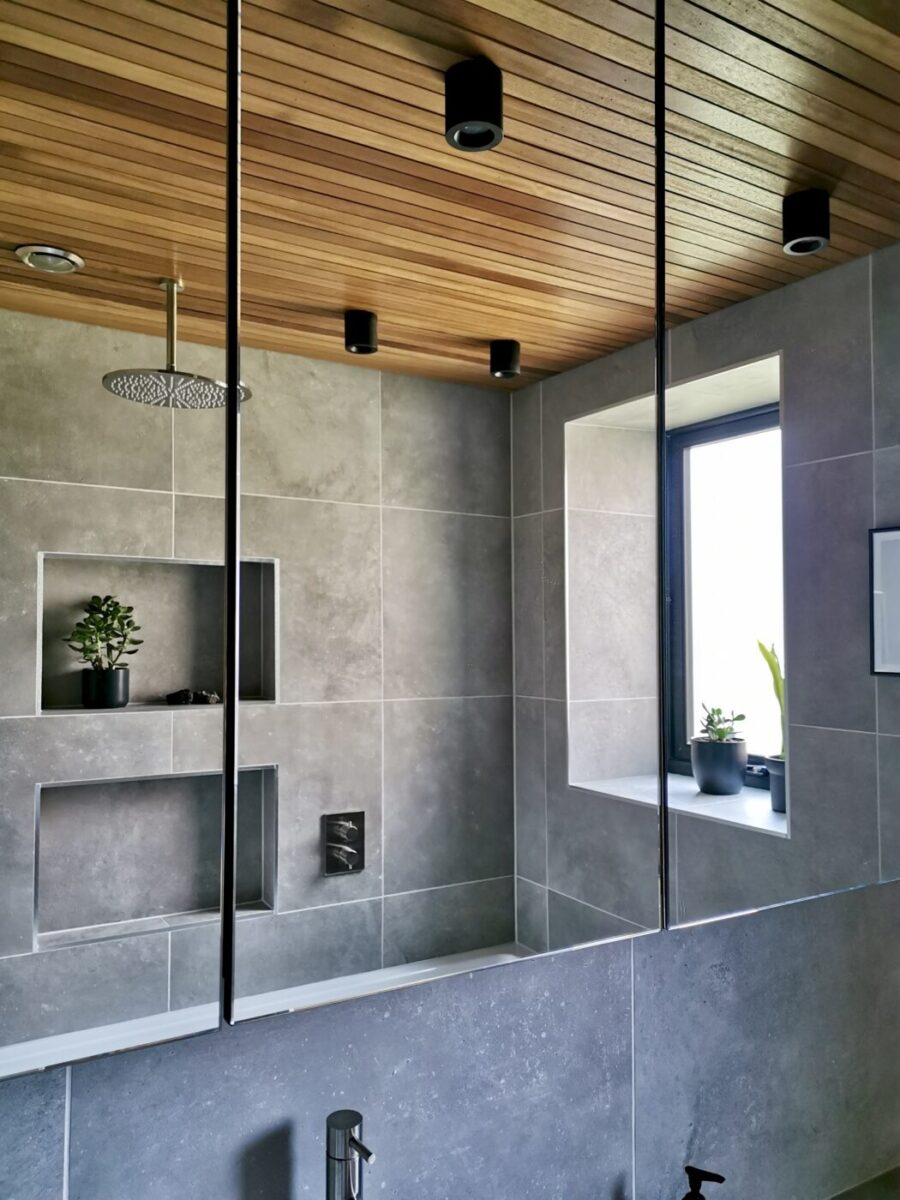
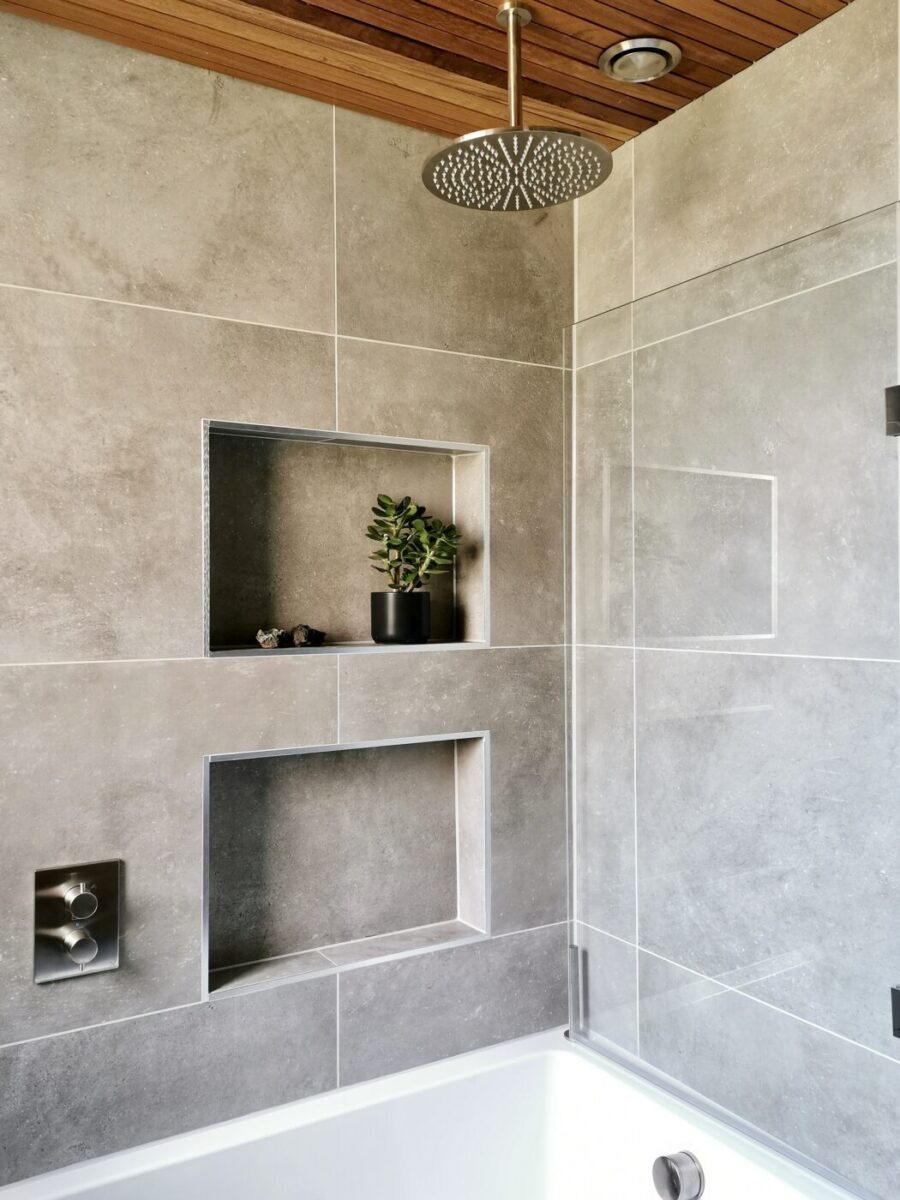
The fixed shower head was plumbed in from the ceiling which left all of the walls around the bath completely clear and the two large niches (with recessed LED lighting for more relaxing bath times) keep the edges of the bath clear too.

Before
Now let me talk you through this unassuming, but rather brilliant valve by Crosswater. It’s a three-way valve which means it controls three different outputs. I love how everything’s completely hidden, let me show you…
In the pic above you can see the three outputs all controlled by that one valve:
- The ceiling mounted shower head
- The deck mounted shower stick (mainly for showering off the pooch) which you can just about see tucked in the back right hand corner behind the shower screen. The plan was for it to be positioned in the left hand corner, but I wasn’t involved in the implementation of this design, apparently there were some plumbing issues which means it needed to go here instead.
- The bath filler.
But where’s the bath filler?
It’s there! See that bath overflow? That’s also the bath filler. Love it. So there are no pipes, rails, hoses or taps hanging over the bath. Everything is hidden away and all worked from that natty little three way valve.
Before
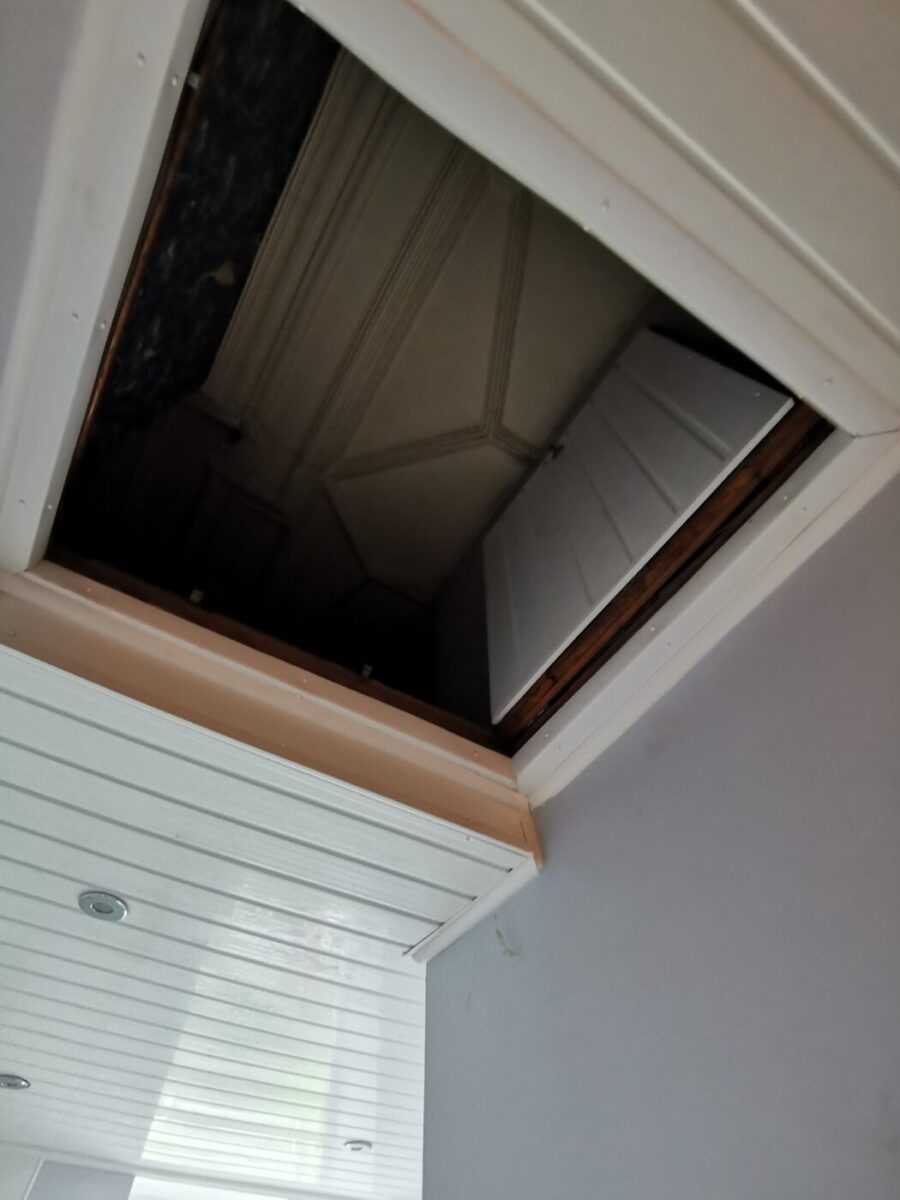
Hatch into a crawl space
You can just about see the beautiful Georgian panelled ceiling. Alas, we couldn’t take the false ceiling down to expose this beauty as the apartment needed this void to house all the wiring and plumbing that ran between the individual apartments. It was one of the reasons for cladding the ceiling with the Iroko slats, to make the ceiling in this room stand out as much as the other ceilings in the apartment. Hard to compete with the Georgians, but I do think the Iroko is a lovely feature in this bathroom.

The new ceiling was raised a little and the space above was re-boarded so it would be used as a more usable storage space. If you look very closely, you can just about see the new access hatch, but Mr B’s joiner did a great job of making it look almost invisible!
I’ll end with one more before and after, because, aren’t they always the best bit!
Before
Thanks again to Mr B for letting me share the photos with you all here. And thank you to everyone who commented on the previous reveal from this project. If you’ve not seen that one yet, click here to see all the before and afters from the open plan living, kitchen, dining space. As ever, it’s a real treat to here your thoughts so let me know what you think of this bathroom re-design in the comments below.
Cool AF Karen!!! 😎
Ha! Thank you anonymous person 🙂
A triumph – you can really work a tricky space. I really like the considered tiling, can I ask what tiles they are and where from.
Thank you Elizabeth!
And yes, sure – the tiles are the Map Light Grey tiles from Structural Skins.
https://www.structuralskins.co.uk/concrete-effect-tiles-1/049fkfp2md9rph46nm1p6zz87bz57n
Thank you for replying – rectified; does it make a difference?
Love everything about this, and that ceiling – amazing. What paint did you use on the bathroom door?
Cheers very much! And it’s Perse Grey by Paint and Paper Library, the same dark grey that we used on the ceiling in the living space.
Hi, I’m curious about how one designs a row of mirror cabinets like you’ve done here. They look great and I’m thinking of something similar for my bathroom, but I’ve always assumed it would be very expensive to have someone make them up, compared to buying something off the shelf that’s ‘almost the right size’. Are you able to give any guidance based on your experience?
It’s all about fining the right joiners. I can’t express enough how having something made to fit a space is always the way to go if your budget can stretch to it. Sure it’s expensive, but if you’re planning on staying put for a while, it’s worth every penny! This tiny room wouldn’t be half as good without this cabinet as it’s all about the reflection of that ceiling.
Awesome work, Karen! Can I ask the source of the basin and its under cabinet?
Thanks Jo. The vanity unit was from Tikamoon and the basin was from Drench 🙂
Cor, that’s all very sexy!
Ha. I do like a sexy bathroom. Thanks Jenny! 🙂
Oh I love this! Please can I ask where the mirrored cabinets are from please? Thankyou!
Thank you! They were made bespoke for this project 🙂
Absolutely brilliant, no surprise.
Ah thank you Kate. That’s super kind x
This is sexy, I didn’t think I’d ever call a bathroom sexy.
Haha. A second vote for sexy – who’d a thought it! 🙂
Anything you do is spot on Karen. I hope your client appreciates how lucky he is to have you as a designer.
Ah thank you Glyn, I really appreciate that 🙂
Hi Karen,
Fantastic finished result! Do you mind saying where the 3 way valve/shower head came from?
Thanks
Michele
Sure – the brassware was all by Crosswater and we bought it from Drench 🙂
What an amazing transformation of a small room. Really love this Karen, especially the mirrored cabinetry (now thinking of some just like that for our new bathroom and en suite) and wooden ceiling. Is that a specific ceiling wood product or something bespoke?
Thanks Paul. The ceiling was clad in Iroko slats which were sourced from a timber merchants. Speak to your joiner and they should be able to advise 🙂
A triumph Karen ! You show us how you get every detail just perfect so that this bathroom really works beautifully. I’m sure your client is super pleased with his space now. @kalamazoo
Thank you very much! 🙂
Hi Karen, I love this bathroom. I live in a Georgian house and want to update my tiny bathroom and somehow squeeze in a shower by sacrificing the linen closet. As the bathroom is now, it lacks ventilation and I worry about the effect this has on the fabric of the building so much so that, even in the middle of winter, I won’t let anyone take a bath without the window open. Do you have any tips about ventilation for bathrooms in old buildings?
Thanks Jenny – glad you like it. I don’t have any specific tips i’m afraid, but you defo need a decent extractor fitting. This room had terrible issues with damp coming up from the floor (it’s a ground level flat), so the room was tanked and underfloor heating was also laid to provide residual heat as well as a dual fuel towel heater so it can be switched on in the summer without the need for the house system to be on. Only time will tell if this has solved what looked to be longstanding issues **crosses fingers**