
Hello hello! From kitchens to bathrooms, today i’m back with another final reveal post from the 70’s flat. This time it’s the marble and black bathroom, and thankfully despite bathrooms always being the most difficult spaces to design, plan and implement, this room (unlike the kitchen) went swimmingly.

As this bathroom is in a flat, things like relocating the foul pipe onto another external wall or altering the size and shape of windows were not allowed. Basically anything that affected the external appearance of the building as a whole was a big fat no. We also couldn’t move or take out any internal walls within the flat, which was pretty frustrating as the bathroom housed a huge, floor to ceiling cupboard which took up about a 1/6th of the floor space.

Before – Massive storage cupboard which originally housed an old water tank
We did however, relocate the washing machine (originally in the kitchen) and added a drying space into the massive cupboard, meaning the flat never needed an airer setting up in the spare room. The classic guest-bedroom laundry move i’m sure you’ll all have succumbed to at some point.
Anyhoo, after chatting with Mr J about how he used his bathroom (did he ever have a bath or just shower?) it was clear that the bath was obsolete and actually a large walk in shower would be a better use of this tiny space. I don’t buy into the designing a room “just incase you sell” in X number of years. If you don’t want a bath, don’t have one. Baths are massive and a waste of space and money if you don’t use it. And guess what guys? If the future new owner wants a bath in their bathroom, they can put one back in. Simples.

When planning a bathroom, the position of the loo is the problem to solve first. There will be places it can go fairly easily and others where it’s a lot more tricky. It’s always easiest to position the loo on an external wall (as above) so the waste pipe can run right outside. But that’s where I also wanted the shower to go, like so:
 This really was the best position for the new shower, but it created several logistical issues with the fixed toilet waste. The waste still needed to exit where it sat beforehand, so we had to plan around some tricky boxing in and a step into the shower to hide the waste and plumbing underneath.

It’s sometimes possible to sink all of this pipework beneath the floorboards, but because of the age of the building and the limitations on internal alterations, this was the only work around.
Bathroom planning = Compromise
Once we’d worked out the feasibility of moving the loo, we moved onto the design, overall feel and finishes. Mr J, the homeowner had a clear idea of what he wanted. I tried to steer him towards a light grey, Scandi, geometric tile (given the era of the flat) but he was set on marble. Marble and black to be precise.
And so it was…

Mr J’s classic monochrome shower room – concept

And drawing of all the individual pieces to scale:


After everything was checked, checked and checked again, it was time to start ordering the shopping list which is handily listed here for you:
- Wall Tiles
- Floor tiles
- Shower Tray
- Sliding Shower Door
- Shower
- Tap
- Wall Lights
- Combined Vanity
- Basin
- Mirror

Once everything had arrived (and made it up two flights of stairs) it was time to get started…. First, rip out the old bathroom and get started on the new layout with first fix plumbing and electrics.
Here’s the room, ready for tiling:
Hopefully the video gives you an idea of the compactness of the space we were working in, with this next photo being a great example of why bathroom refurbs need plenty of space outside for prep and planning.

Tile layout planning


Tiling in progress

Furniture in and getting ready for second fix
And here’s how it looked once complete:

It’s a bit different isn’t it!?

How to make a ridiculously small space feel bigger? That’s right! Fit a huge ass mirror. As soon as this went in, visually, the room doubled in size. And yes, there was a demister pad fitted behind the mirror too, so no fear of “steamy windows”.

Reeves Wharf fitted bathroom furniture – Victoria Plum
A combined cabinet wouldn’t have been my first choice design wise (I would have loved to have had something bespoke made), but due to an already stretched budget, I needed to source something off the peg to house the cistern, water pipes and hide the waste pipe that ran around the right hand corner all the way to the back of the new toilet. Finding a combined vanity within budget that was exactly 1400 wide (not white gloss) was not an easy task, I tell thee.

Mr J admitted he wasn’t big on cleaning, so anything freestanding would have become a dust-trap. A fully fitted piece of furniture was definitely the way to go for this space. Less cleaning and not a waste pipe or bit of pumbing to be seen!

The beautiful IP rated, Bernadotte Double Wall Lights by Old School Electric add a soft light to to this corner tucked behind the boxing in. And obviously, they look bloomin’ lovely whether on or off.

The Carrara White Marble effect tiles from Total Tiles continue throughout the whole bathroom, adding a real sense of luxury to the smallest room in the flat.


When I come back to show you the hallway, this flooring will make more sense. The tiles continue straight down the hallway for another six or so metres, all laid on a diagonal to help give a greater sense of width to this narrow space.


A quick peek at the hallway showing how the flooring and colour scheme continues straight through to the shower room. More on the hallway soon.

Laundry cupboard doors fitted with Hive Hexagonal bar handles from Dowsing & Reynolds

The boxing in for the poop pipe did need to be higher than the height of the shower tray, but it didn’t need to be this high (450mm above the shower tray) so you might be wondering why it is. Couple of reasons really:
- so it didn’t look like another weird step
- so it could be utilised for bottle storage
- to assist with leg shaving
For those leg shavers out there, how annoying is it trying to shave your legs in a shower? Not in a shower over a bath, that’s the ideal set up, but shaving your legs in an actual shower enclosure is so frickin hard! You put the shower gel on your legs, try and balance on one leg and prop your other one up against some wet, slippy tiles, then gravity and water washes away the soapy lather so then you cut yourself as your leg inevitably slips down the wall. Brilliant.
The 450mm ledge is to replicate the edge of the bath. So for any leg shavers who may frequent this shower room in the future, you and your hairless, nick free legs can thank me later.

Ok one last thing – because I know someone will ask:
How much did it cost?
And i’m happy to answer this, mainly because everyone seems to think they can get a bathroom done for £5k. Including Mr J. £5-6k was the budget he had in his head for this room. And do you know what? It is possible to get a bathroom done for that, but not this one. The actual cost for this room was just over £10k. About £6k for labour and the rest on fixtures, fittings and furniture. Then of course there was me to pay for.
For those wanting to achieve a similar look, here are some places where you could look to save money:
- Not tiling the whole room – tiles and a good tiler are expensive.
- Going for chrome fittings and brassware instead of black – going black definitely doubled the cost on those purchases
- Not relocating the loo – layout reconfiguration = more ££
- Not having wall lights
- Go for a single flush ceiling light instead of downlights
And I did discuss each cost-saving option with Mr J so he could make these financial decisions fully armed. But he knew what he wanted and felt pushing his budget was worth doing to get the bathroom of his dreams. So he did. And has no regrets.
Value > Cost
So that’s your lot for today. I hope you like what we did with the place. As always, I love hearing your thoughts (not the rude ones, obv, they kind of suck). I’ll leave you with just one more “before and after”…
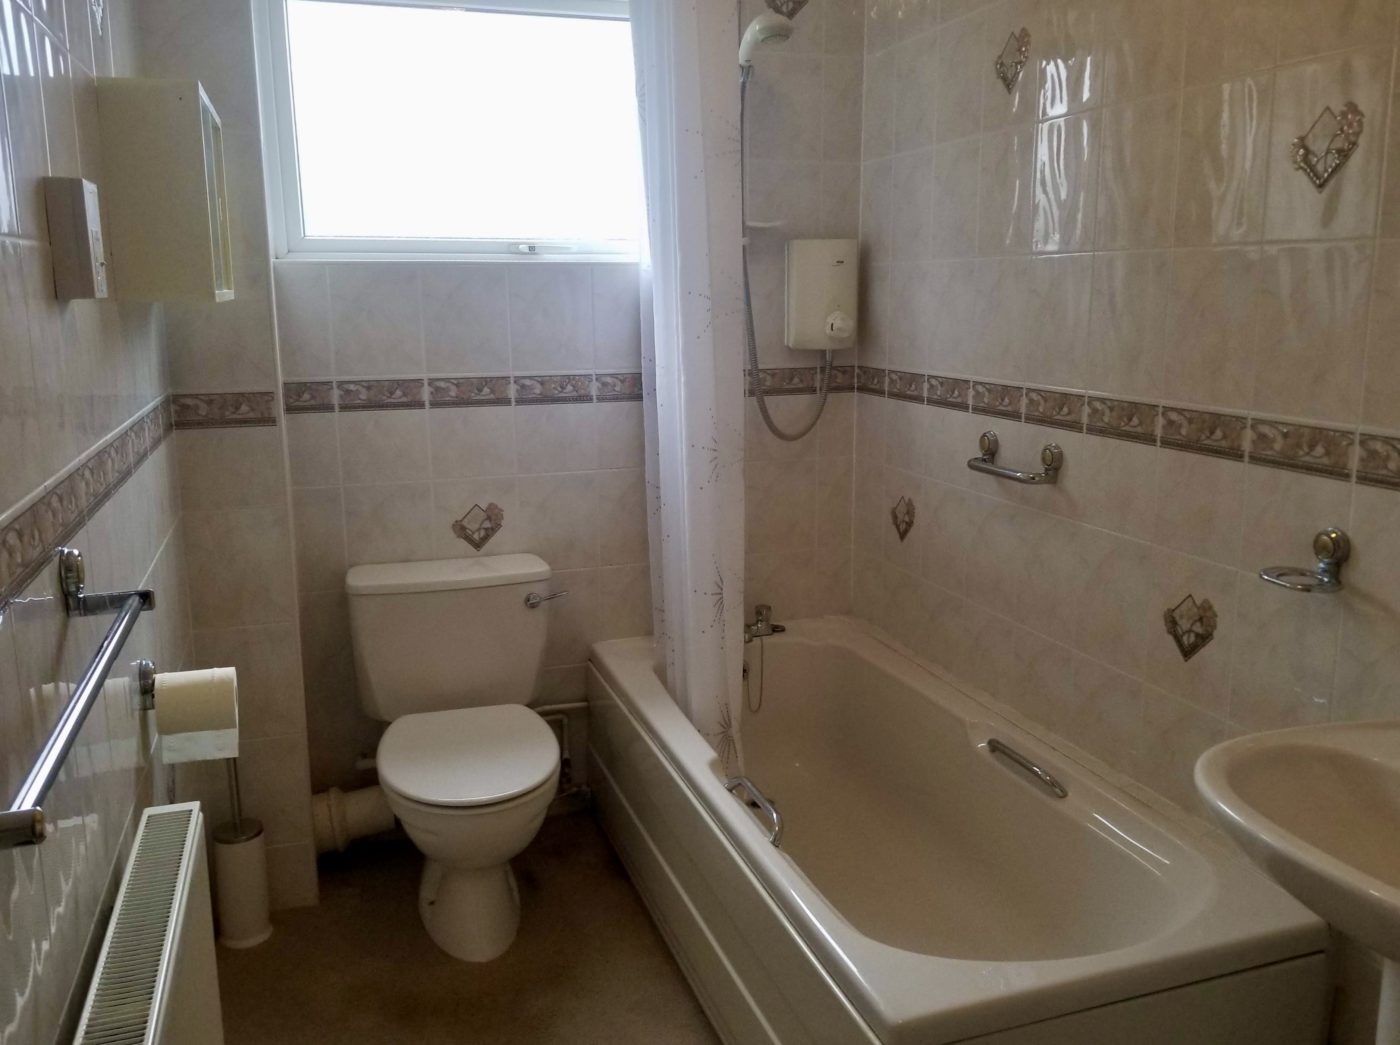
Before

After 🙂
Wow… U did it again- v classy.
Thank you very much!
This is awesome, love all your ideas! X
Cheers – that’s really kind!
This is great and an excellent example of how you can pick up a clients vision and run with it it to the next level. Just the safe pair of hands you need when you are spending more than you budgeted. I compromised to stick to budget with my bathrooms – and I regret it every time I go in there.
The shower tray seems higher than the usual riser kit? Is there a reason?
E
Thanks Elizabeth! And yes, because of the waste pipe for the loo needed to run underneath, there was no other way around it I’m afraid.
It works though – what did you use to face it? Floor tiles?
Yep
This is lovely. The direction of the flooring definitely helps with making the space feel bigger, and connected with the other spaces. The layout is fab too! Definitely on team don’t install a bath just cos of resell!
Thanks Kayleigh, good to hear you’re on the same team 🙂
Oh , wow Karen! What a transformation. It looks fab. And the diagonal flooring is such a great idea. I love everything about it! xx
Thanks so much Cara – so glad you like it!
Wow fabulous!! And thank you for your real-talk in terms of cost because sometimes to get a bathroom that looks THIS sexy, well, ya gonna need to spend that bit more. Totally worth it though, it’s stunning xxx
Aww cheers Ms D. Really glad you like it. And yes, I hate having to burst people’s bubbles on the cost front, but it’s the labour that people don’t really take into account for jobs like this. Bathrooms are pricey buggers!x
That looks SO SLICK!!! Well done Karen.
Thanks so much Kathryn – that’s really kind!
This is the best post you’ve done (in a field of stiff competition). I absolutely adore the new bathroom. It’s beautiful. Thank you for explaining it all, I find it so helpful.
Ah cheers Jenny. That’s really nice to hear. So glad you find them helpful!
Hi,
Thanks for sharing. Fab transformation. The only I can see as a challenge outside of all the boxing is the window in the shower itself. The water is going to constantly be on the window. What did you do to stop water ingress, mould development etc. Love your work you are so thorough.
Thanks so much
Kathleen
The sill doesn’t actually get that wet. But it has been tiled on a very slight slope, so any water falls off and into the shower. We have a similar set up in our own bathroom and have had no problems at all.
Looks very luxurious and I really value all the rationale you’ve given for doing things in a particular way. I might have preferred the scandi grey, but its’ not me that has to live with it!
Yep – me too. But Mr J knew he wanted marble and a hotel feel, and whilst it wasn’t quite my bag either, he loves his new space 🙂
Marble and hotel feel (with shower, not tub!) is my jam too, so it’s no surprise that I love this bathroom and the practical decisions that went into it.
Love it..love your style!!
My first read of your blog. I am now a die-hard fan (fan finie)!
Ooh thank you! 🙂
Wow, Karen! It was a fabulous transformation. Wonder I could apply the same diagonal orientation in my bathroom tiles. That seems to be more worthwhile!
Thanks again for the put up.