
I told you it was coming soon! If you read my last post, you’ll know it was time for me to say goodbye to our gloss white kitchen. Feel free to have a little read of that one if you want to know the what’s and why’s…
Here’s the wall cabinet layout i’ve had in my head for years and the one I think it going to make our little kitchen look hell of a lot better AND give us more much needed storage. I wanted to move the existing wall cabinets up towards the ceiling, wrap a third cabinet around the extractor hood and add two more open cabinets below, either side of the extractor. Simple no!?
I didn’t want handles but I also didn’t want the traditional handle-less J profile design our original kitchen doors had. If i’d gotten my way, I would have had doors than opened by telekinesis, but as my powers of mind-control weren’t quite up to scratch, we went with push openers instead. Fair enough.

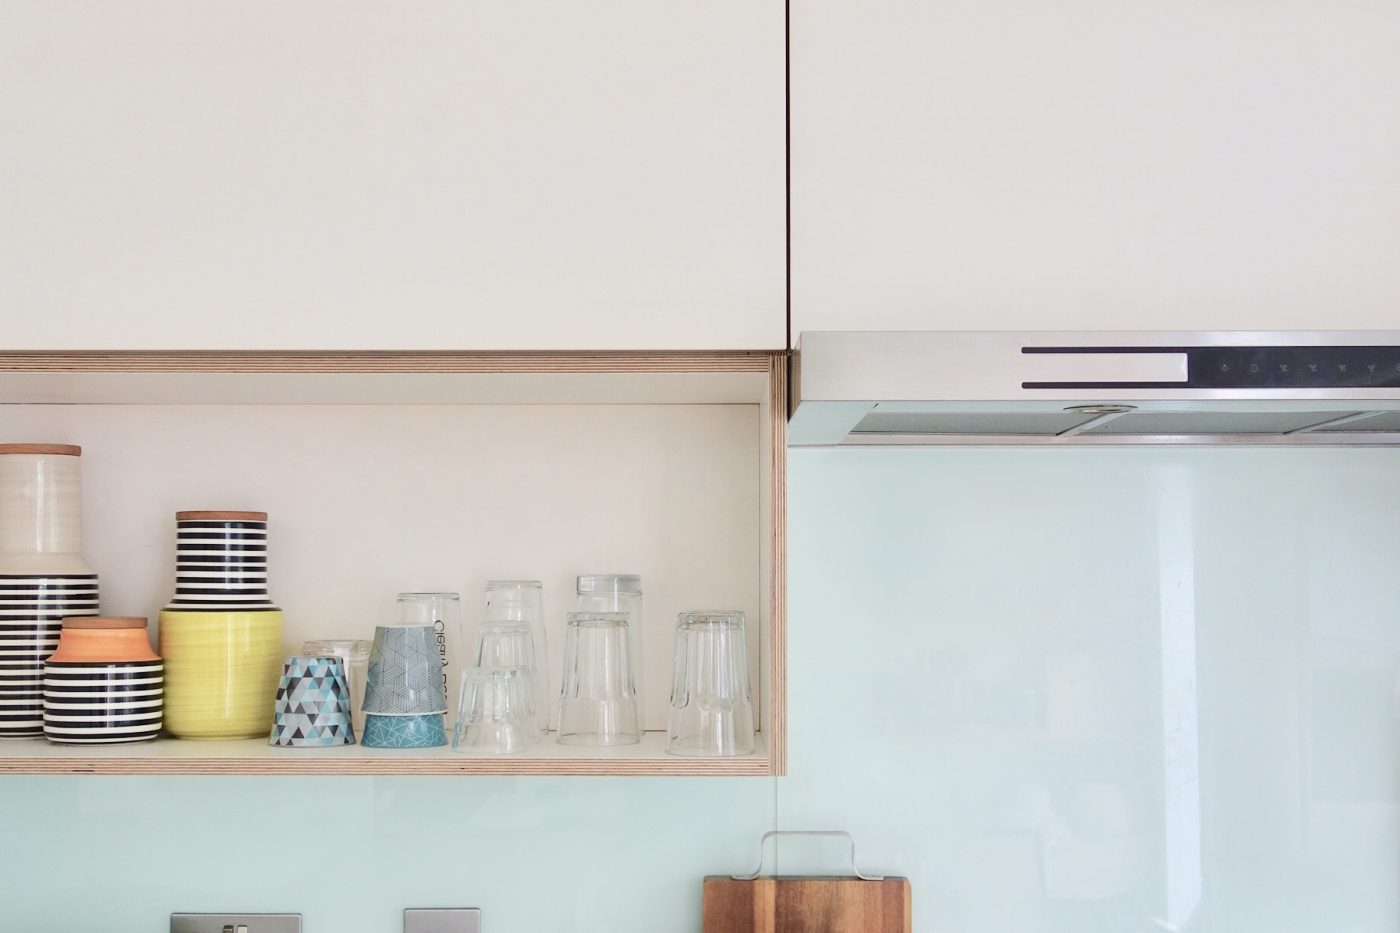
It’s difficult to capture with my average camera skills, but the new door fronts aren’t a solid white. I wanted a slightly translucent finish so you could just about see the grain peeping through. Birch’s natural grain is very subtle, so admittedly it is quite hard to see, but it is there


My fab joiners did a fair amount of testing to get the depth of paint cover just right. From a distance it looks white, but up close and personal you see tiny colour differences and detail in the wood grain. It also feels so much nicer to touch than our old gloss fronts. To me, anyway.
In the next photo, you can see the difference quite clearly between the old gloss fronts and the new birch ply fronts.

Bare Joinery at work
Side by side, the birch fronts have a pink tinge, that’s the colour of the wood coming through the white finish. It’ll be interesting to see if they change slightly over time.
So onto the finished pics eh? A little reminder of what we started with on Wednesday morning…
Before
And here’s what it looks like 48 hours later:

After
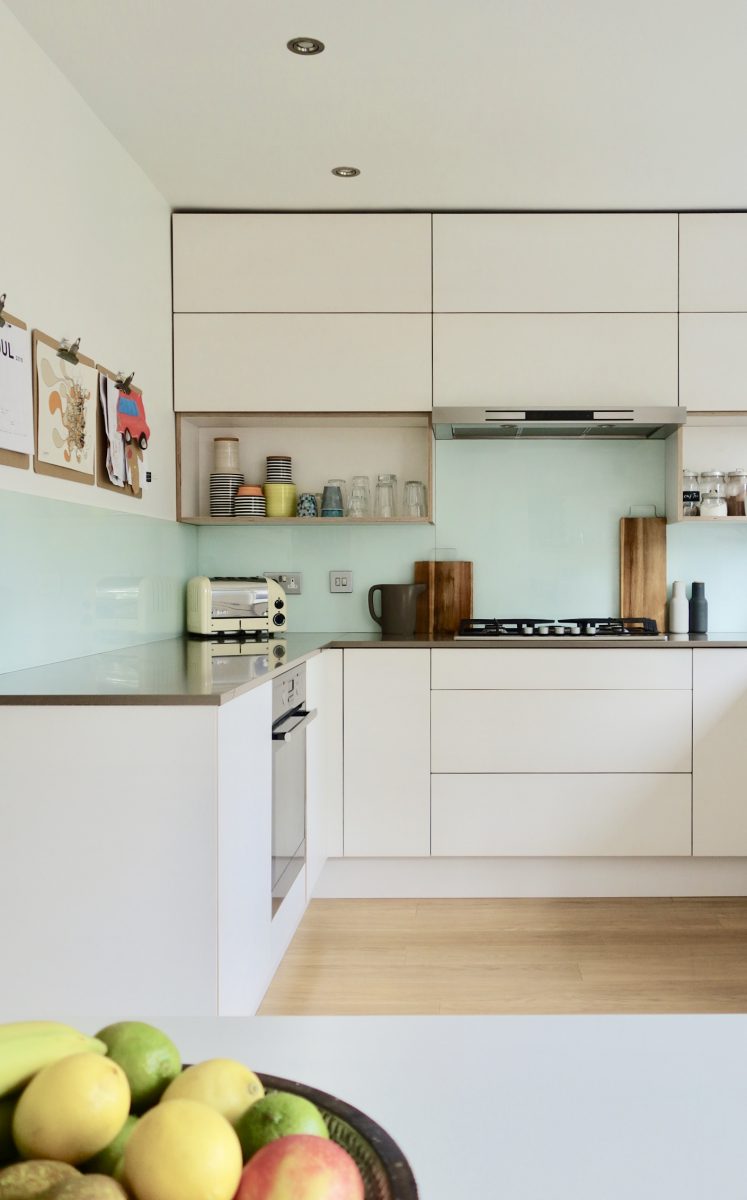
I’m so happy with how it’s all turned out. It feels like a proper bespoke kitchen now. Well I guess half of it is!

So a little look at how we did it….

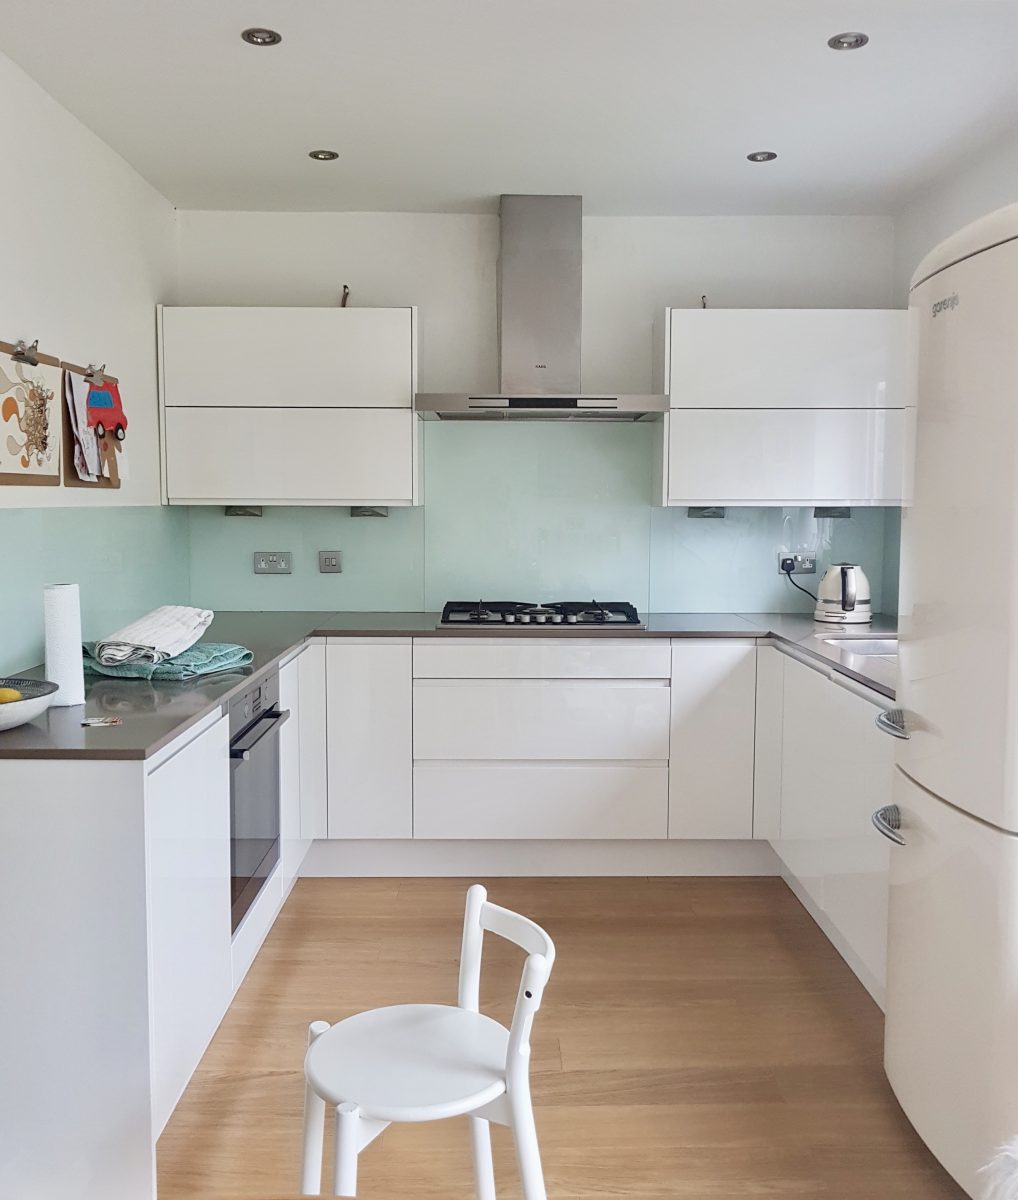
The original wall cabinets were moved upwards to allow the new open cabinet to sit in its place. I wanted the doors to align, so when closed, the horizontal lines made the space feel wider and the height of the cupboards make the room feel taller.

It definitely worked. The kitchen certainly feels better designed and more substantial. Open storage certainly isn’t for everyone, but putting more doors on this wall would have been the wrong thing to do for this small space.

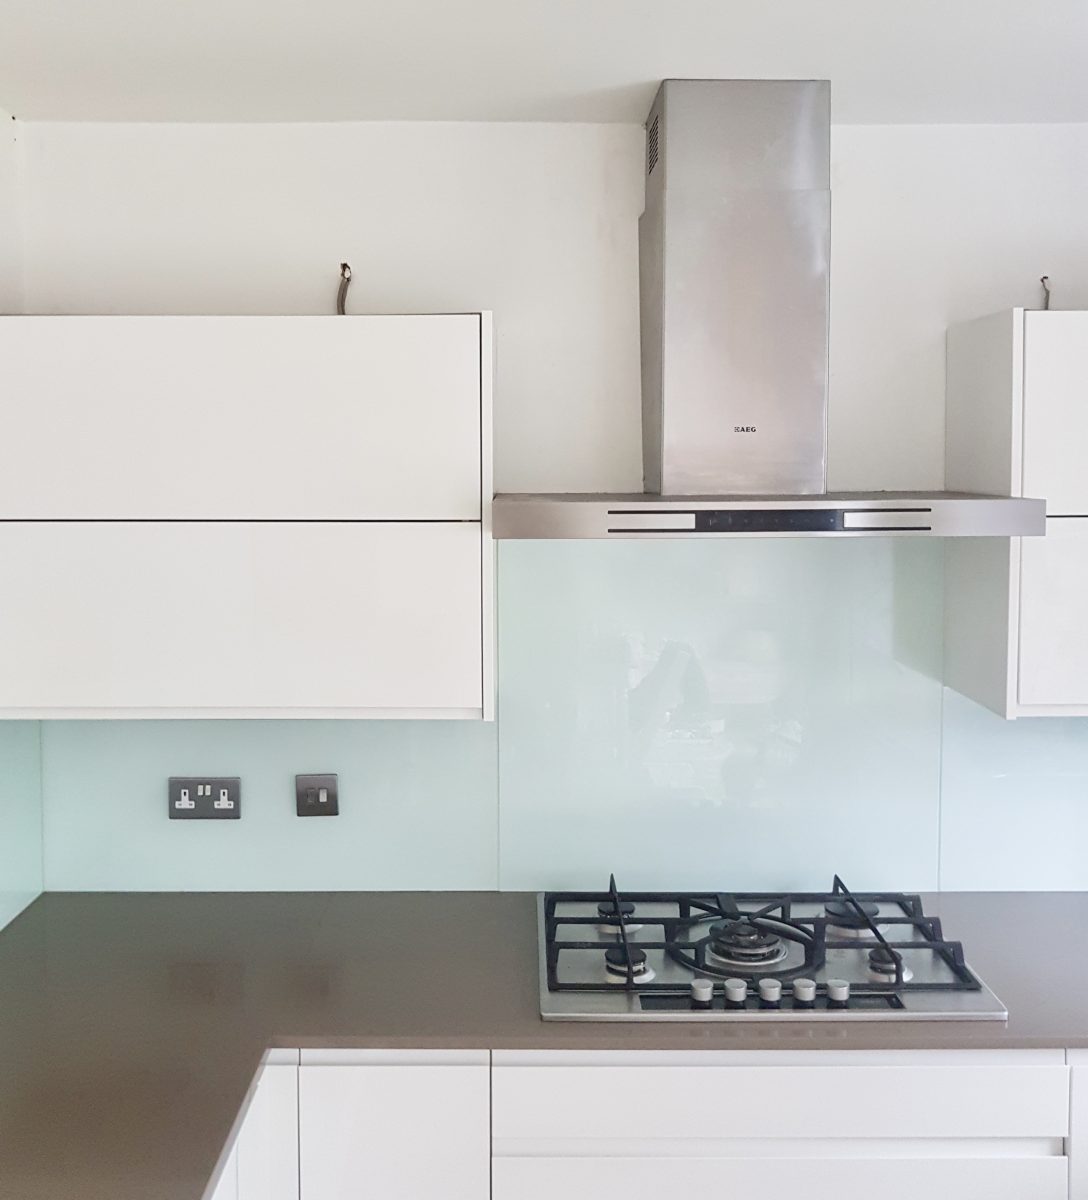
What used to be wasted space around the hood, has now been put to good use. Luckily we had an extra wall cabinet sent when we had a slight problem with one of our existing ones. But hubby fixed the first one, so the extra carcass has been sitting in our garage for the last 3 years. Serendipity.

With the back cut out to sit around the extractor pipe, this extra cabinet fits perfectly above the hood, giving us even more much needed storage.

As mentioned before, all of the doors have push openers on, so no need for handles (apart from the dishwasher of course). BUT, we’ve yet to sort the push openers for the drawers as it seems, after spending a day researching cabinet hardware and speaking to Blum, it’s not as simple as it sounds. So at the moment we’re scrambling around to open our drawers trying to find a way of not having handles AND not spending £150 for three new runner kits. If anyone has come across any retro-fit push openers for drawers, please let me know!!


On the other side of the kitchen, I used this opportunity to update our kitchen table top. We have the Ikea Ingatorp and the top has not faired so well. There’s a massive, quite well know design flaw with this table, the white edges peel away leaving water to get under the white surface. The MDF just swells and forces the white surface to chip off more and more. Basically, it’s buggered. And we’ve had it like that for the past 4 years, reluctant to get a new table or top sorted until Charlie had learned not to bang his knife and fork ends on the table in time to Paw Patrol.

But, FINALLY, we have a table top that’s not dinked, chipped, or has a bubbling, peeling surface! There was nothing wrong with the base at all and I really didn’t want to have to buy a new table, we just needed a new top….

… and now we have one, and a beautiful top it is too.
And whilst I was snapping away, I took one of my Ikea SPANST light propped up against the wall. I wrote all about the Ikea SPANST collection here if you’d like to read more.

Oh and yes, you can see the new workshop outside too. More on that coming real soon. We sure have been working hard on the house this year, it’s for a good reason though. All with become clear after the summer **crosses fingers**.

So that’s your lot for today. What do you think of the update? Was it worth it? I’m sure some of you will think not. And that’s fine. But for me, it was totally worth it. The difference is subtle, but these small changes have made the biggest difference. Would love to hear your thoughts on our latest home update!
I love it! I’ve become really obsessed with plywood lately and saw a lovely kitchen at Grand designs live completely made from plywood. Love the edge detail x
Nice work.
Looks great!
Brilliant transformation and very clever to use the existing carcasses and moving them to make much better use of the space. The difference is subtle but my goodness, it really works so much better now! Love how you tied the ply with other areas of your home – it’s little repeating features like that which really give your style consistency xxx
In America it seems to be a very normal thing to take cabinets right to the ceiling – it looks great and it is practical, I don’t know why we don’t do it more in this country. Your transformation looks fantastic, so high end and, as you say, bespoke.
I love your kitchen upgrade, the Birch Ply looks great and I agree that the space looks bigger. When we have our extension built I’d like a full (recessed) wall of handleless cupboards in the living area that would look fantastic in the Birch Ply. I was originally thinking of using colour Mondrian style but seeing the all (off) white with clean lines has made me rethink!
Good job!
looks awesome !!! really does
can’t believe you had that extra cabinet sitting there – was meant to be for sure.
really love the 2 x open shelves as it balances that area SO much better
really spot on partner !
This is really fantastic it has opened up the room beautifully – it does look wider and taller. And I love the softening of the painted wood. Skill fully done!
Clever girl! You have given me some BRILLIANT ideas for an almost identical gloss cream kitchen!
Simple and so effective. Thank you.
Liz
Amazing! An absolute yes, yes and yes. Those wires at the top of the old cabinets would have driven me bonkers, too! Can’t think how anybody could possibly object to your perfect solution!
Looks so much better. Great idea to wrap the spare cupboard around the extractor. I think you should splurge for the drawer closers, or surely Blum would sponsor a post on retrofitting their system.?
I think you have just given me permission to rip out most of the 2013 ensuite that came with my brand new house & has never really worked for me. The spontaneously shattered shower screen is the trigger.
Looks great, really good idea with the cupboards!
Looks really good, and better balanced in the room too. I like how the cupboards open – very cunning! Took a while of peering at one pic, then back to another before I worked out what was going on. That’s really clever.
Looks fabulous and looking forward to hearing about what is coming next!!!!
xx
Great transformation! I’m very intrigued at how long the first stage took from start to finish, as I have a 1930’s house and I plan to mock down the wall between the kitchen and dining room to open the back of the house up.
It’s quite a while ago so difficult to remember exactly. Probably about a month all in to knock down the wall, reconfigure, fit out the new space and add the new kitchen. All depends on how well it’s planned, the quality of the trades and any curve balls the build throws though. It’s not a one size fits all kinda thing really…